With well-structured M code, you’ll need far fewer DAX formulas later in Power BI, resulting in faster and more efficient reports. Most Power BI users are eager to jump straight into data visualization, but first encounter the Query Editor, where they load and transform their data. This step often doesn’t get the attention it deserves.
At first glance, the Query Editor’s interface (pictured below) seems limited. However, anyone who understands the underlying code being generated in the background will quickly discover many more possibilities than the interface alone reveals. I expect that M code will become even more important in the future, especially since it is used in Dataflows Gen2, which is a key component of Microsoft Fabric.

Every “step” you perform in the interface, shown on the right-hand side, automatically generates code in the background. This code is called M.
You can view this code through the Advanced Editor (more on this later). While the code may initially seem intimidating, it’s not actually that complex. Especially nowadays, with AI tools available to assist you.
Mastering M will allow you to do far more than the standard interface permits. KroonBI’s blogs on Power Query M are relevant for both Power BI and Excel users, as Power Query is now an integral part of Excel as well.
More M, Less DAX and VBA
If you organize your M code properly, you’ll find you need very few DAX formulas later in Power BI. DAX is the formula language used after loading the data to Power BI. This is different from the M language this blog focuses on.
Personally, I’m a strong advocate for minimizing DAX usage by setting up Power Query properly from the start. I prefer using Power Query wherever possible because transformations are then structured in a clear, chronological order, whereas DAX logic can often feel scattered and less intuitive.
Power Query has also become a standard part of Excel. I expect that Excel VBA will increasingly be replaced by Power Query solutions, especially when M code is applied correctly.
Practical Examples
Below are some examples of tasks that are difficult or even impossible to achieve by simply clicking through the interface, but are easily doable when you understand the underlying M code. (We’ll cover these in future blogs).
Dynamically loading column names:
Have you ever been frustrated by entire Power BI or Excel reports breaking because a column name in your source data changed? When using the interface, column names are always hard-coded, causing errors if they change. With M, you can dynamically reference column names instead.
Replacing multiple values at once:
You can replace multiple values in a single step, instead of creating ten separate “Replace Value” steps.
Adding clear comments to each Power Query step:
This helps even less-experienced colleagues understand what you’ve done.
Handling expected errors gracefully:
For example, if you anticipate that a new column might be added in the future, you can write M code that accounts for it upfront.
Dynamically integrating logic from existing queries:
You can reuse and combine query logic dynamically across multiple queries.
Reusing transformation logic with custom functions:
Instead of manually setting up the same steps for five different SharePoint folders, you can create a single custom function. This way, you only need to update one function if something changes, rather than updating five separate queries.
Getting Started: Understanding let and in
You open Power Query by going to the Home tab and selecting Transform Data.

On the left hand side, select a query you want to examine. On the right hand side, you’ll see all the transformation steps you’ve clicked together so far (if you already had a query).

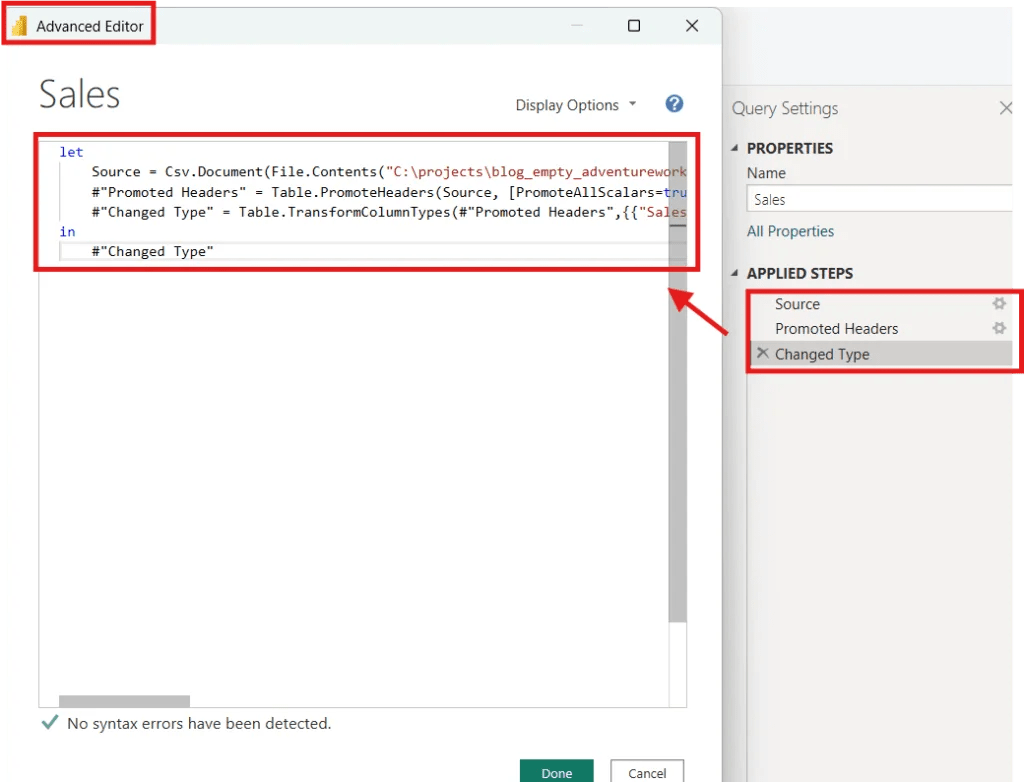
Each step generates M code, which you can view by going to the View tab and clicking Advanced Editor.

Now you’re ready to dive into the Advanced Editor! (Hopefully, its clunky design will get an update one day…). You’ll notice that every auto-generated query starts with let and ends with in. Here, you can see the M code behind all the steps which you saw on the right hand side earlier.
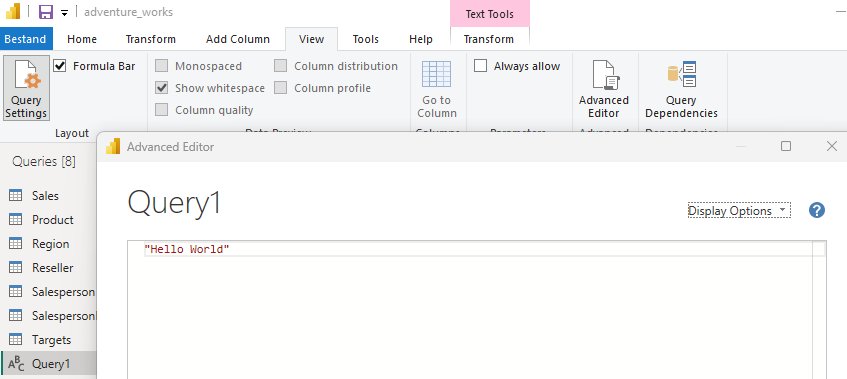
Important: the let and in statements are not strictly required. Let’s test this out: Open Power BI (or Excel), go to the Query Editor, click New Source > Blank Query, and then open the Advanced Editor.
Delete everything inside and simply type:
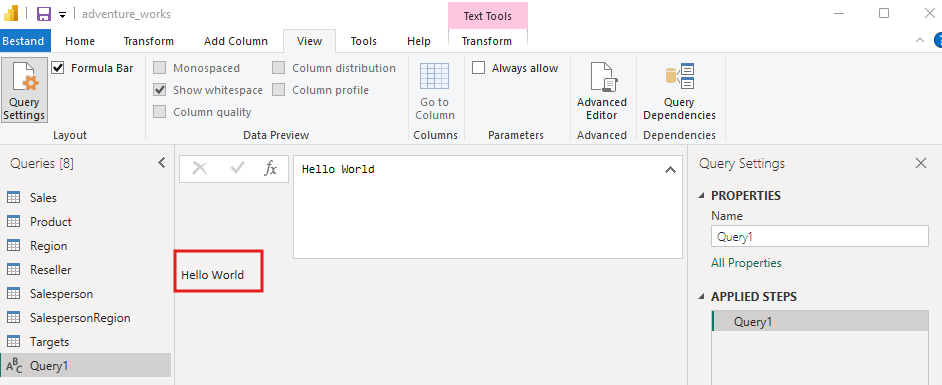
"Hello World"You’ll see the result: just Hello World.
This shows that let and in are not mandatory when you’re only working with a single output.
Congratulations! You’ve just written your first custom M code!
However, if you want to add another value or assign a variable, you will get an error. This is only possible if you do use let and in.
Assigning Variables
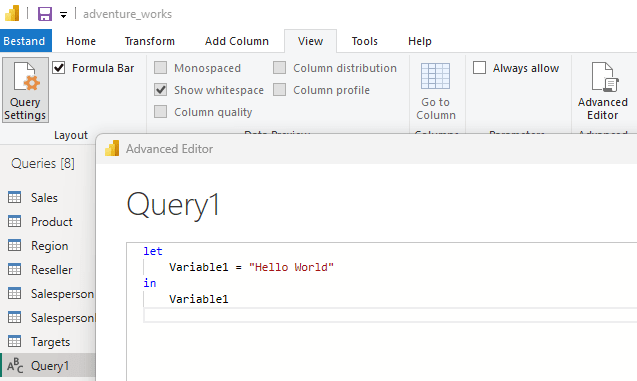
Now, let’s assign the "Hello World" text to a variable called Variable1. This way, whenever you reference Variable1, it will display Hello World.
let
    Variable1 = "Hello World"
in
    Variable1
You need to add the code above in the Advanced editor:
Typically, entire tables and not just single values are assigned to variables this way. The same thing happens automatically in the background when you build queries through the interface.
Under the let statement, you can define multiple variables. However, only the object listed under in will be returned as the query result.
For example, you could define several variables in your query, but only variable1 will actually be shown.
let
    Variable1 = "I have a great manager",
    Variable_I_do_NOT_want_to_show = "I hate my manager"
in
    Variable1
So you can add the code above in the query editor without upsetting your manager.
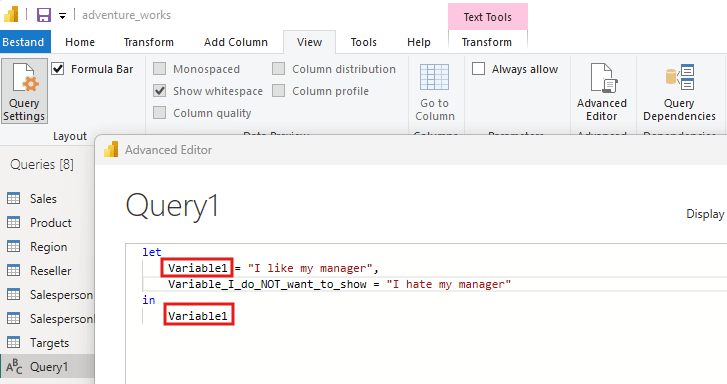
As you can see, only Variable1 is shown. It shows I like my manager. Variable_I_do_NOT_want_to_show is ignored unless referenced.

Intermediate steps
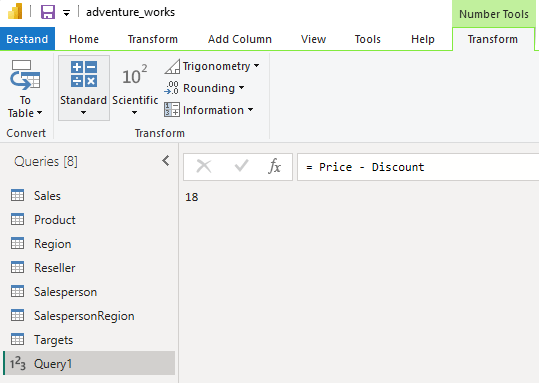
Of course, the example above does not reflect how intermediate steps are typically used. In practice, intermediate steps are incredibly useful for building complex logic behind the scenes. For example, we might define a discount first, and then use it to determine a discounted sales price. Here’s an example of the M-code in the advanced editor:
let
    Price = 20,
    Discount = 2,
    Discounted_price = Price - Discount

in
    Discounted_price
The result is the 18 we would expect.
Note that you don’t have to delete earlier steps if you don’t need them immediately. For instance, if you temporarily stop offering discounts but expect to bring them back later, you can simply adjust the in line rather than rewriting the entire query.
In the simple examples illustrated above that might not save much time, but for more complex discount calculations, this approach can be a huge timesaver and help to avoid errors.
Query order doesn’t matter
One major difference between M and many other languages like Python is that the order of the M-code doesn’t matter. When you build queries through the interface, steps are shown chronologically, but this is not necessary. In M code, Power Query focuses solely on the final output.
This is how it works: Power Query checks what’s defined under in, then only executes the necessary steps to produce this result under in. Unused steps are ignored.
If you would run the M-code below, Power Query will first check what is under in and will only execute the steps which lead to this variable under in. So Power Query first examines discounted_price and will check which steps it has to execute to get to this variable. This makes Power Query incredibly efficient, as it doesn’t waste time processing unnecessary steps. As you can see, the code below still executes properly despite that the order of the definitions are shuffled (discounted_price is shown at the top now and the query still works). The order of the code below would not work in programming languages such as Python.
let
    Discounted_price = Price - Discount,
    Price = 20,
    Discount = 2

in
    Discounted_price
Avoid spaces
Note that in the code snippet above I use an underscore instead of a space Discounted_price. This is because using a space in a variable name results in an error. The only way to use spaces in variables is if you prefix it with # and use double quotes:
let
    Price = 20,
    Discount = 2,
    #"Discounted price" = Price - Discount

in
    #"Discounted price"
When using the user interface, Power Query frequently uses spaces in their variable naming. This makes it difficult to read the M-code generated on the background. In the example below, I applied several steps in the user interface and then opened the advanced editor. As you can see, Power Query uses spaces in the variable names it generates, making it hard to read because of all the hashtags and quotes.

By avoiding spaces by using underscores for example, the readability of the code improves.

Conclusion
Here’s what we covered in this post:
- By understanding M code, you can build more efficient queries, unlock more features, and reduce your reliance on DAX and VBA.
- Use
letto define variables and transformations. - No matter what happens under
let, only the result underinappears as output. - The order of steps doesn’t matter. Power Query only executes what’s required for the final result.
- By avoiding the use of spaces in variable names, the M code becomes more readable.
Important:
In the examples above, each variable was assigned a simple value like price = 20. In real-world use, variables typically represent entire tables, not just individual numbers. We’ll dive deeper into this in future blog posts!
Questions?
Feel free to contact me.
